How to Connect to an Existing D365F&O Environment Using Postman - Part 2
- maique00

- Mar 10, 2025
- 2 min read
Updated: Mar 19, 2025
Do you want to learn how to connect to a D365F&O instance using Postman?
If your answer is Yes this post is for you.
Existing blog posts about the same topic were not sufficient for me to be successful.
This blog post describes the second part of the required steps to a successful connection using Postman to D365F&O.
Postman
Postman is a platform user-friendly for non-techies that allows to connect to existing entry points. It is available in a web version and no software installation is required.
To prepare a D365F&O instance to be ready to receive calls from Postman, please follow the first part - https://maique00.wixsite.com/blog/post/how-to-connect-to-an-existing-d365f-o-environment-using-postman-part-1.
It is required to have in hand the following information: Directory ID, Client ID and Client Secret ID.
After, please follow the next steps.
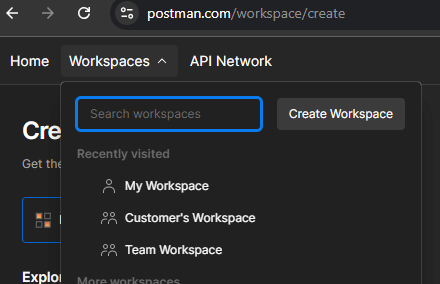
Step 1 - Access to https://www.postman.com/ and create an account.
I strongly propose to use the web version as not installation is required.
Step 2 - Create a new workspace or select an existing one

Step 3 - Create a new collection (select the option Blank collection) or select an existing one
Step 4 - After selecting the workspace and collection, add a request (selecting three dots in Collection menu)

Rename the name of the New Request. I propose to change to Get Access Token
Change the request type to 'Post'
Add the address https://login.microsoft.com/<Directory ID>/oauth2/v2.0/token

Replace <Directory ID> by your Directory ID identified in Azure Portal (First part of this post)
Select Headers tab and set Host as login.microsoftonline.com
Select Body and specify client_id as the Client ID identified in Azure Portal (First part of this post)
Specify client_secret as the Client Secret ID identified in Azure Portal (First part of this post)
Specify grant_type as 'client_credentials'
Specify scope as the URL of D365 instance followed by the text '/.default'
Finally and to finish Step 4, click Save.
Step 5 - Action Send button

With the right configuration, Status will be 200 OK and 'access_token' will be returned in Body > JSON section.
Step 6 - Copy and Paste the access token as a variable
Select the environment

Access the variable button

Copy and Paste the 'access token' retrieved in Step 5 to fields access_token in Environment and/or Collection. Just select the part of the access_token without the double quotes "".
Example: Considering an access_token "eyJ0eXAiOiJKV1QiLCJhbGciOiJSUzI1NiIsIn", just copy eyJ0eXAiOiJKV1QiLCJhbGciOiJSUzI1NiIsIn
Step 7 - Add a request to a D365 Data Entity.
Before connecting, please identify which D365 Data Entity do you need to connect.
To identify, try https://[D365_URL]/data.

This will retrieve all D365 Data Entities available to be used for this environment.
As an example, we will use CustomersV2.
Rename the name of the New Request. I propose to change to CustomersV2
Change the request type to 'Get'
Add the address https://[D365_URL]/data/CustomersV2
Select Headers tab and set Authorization as Bearer {{access_token}}
Select Authorization and change the Auth Type to Bearer Token
Finally and to finish Step 7, click Save.
Step 8 - Action Send button
All being correctly configured, Status will be 200 OK and customers will be returned in Body > JSON section.


Amigo Tyres is a Rocklea based store that supports truckers, families, and businesses with tyre replacement, repair, and mobile services. Visit the best truck wheel alignement in Rocklea !
Visit: https://amigotyres.com.au/services/tyre-rotation-service-in-rocklea , https://amigotyres.com.au/services/wheel-alignment-service-in-rocklea
Looking for yoga teacher training in Dharamshala or yoga classes in Dharamshala? 🏔️ Join Alpesh Yoga in the serene surroundings of Bhagsu Nag, Dharamshala, or experience soulful practice by the beaches of Arambol, Goa. 🌊☀️ Visit- https://alpeshyoga.com/